Perhaps one of my proudest works, Persistanomaly was originally a one week game jam we had way too much fun with that turned into a project in on and off development since early 2025. While we aren't quite ready to share certain details yet, I'm still okay to share some of the technical work i was able to get done on the project.
While i was pretty much split 50/50 doing techart and engineering during the jam, i switched to full techart afterwards and spent a good chunk of time completely reworking a lot of work on the shader and rendering side to better match the stylized nature of the project.
one of my favorite changes was the glitch effect we had. in the 1.3 build and earlier it was done by our other technical artist, Ken Deng. it certainly looked really good at the time, but after seeing inspiration from both other devs online as well as other games with a glitchy feel (i believe i was playing cyberpunk at the time and took some inspiration from that), i felt up to the challenge of completely rewriting it.
the above method in question was heavily inspired by developer Jam2Go, in which he used some screenshots of visual bugs from substrate to mess with the UVs in post process space. i deviated quite heavily from this and used multiple of these for the different R G and B channels. i then used separate panners to move them in different directions, while also plugging a quantized time function into the time slots. this allowed me to pan in a heavily stepped manner to make. it all made things look all the more jagged and broken, which is exactly what you should look for in a glitch shader.
since this was something that we needed control over in game, we wanted to simplify things down to a single intensity or threshold variable that could be dynamically updated in blueprints. Ken initially set this up as the sole variable in his shader, and to not disrupt a ton of our existing code i had to tie a lot of my more complex controls down to a similar variable.
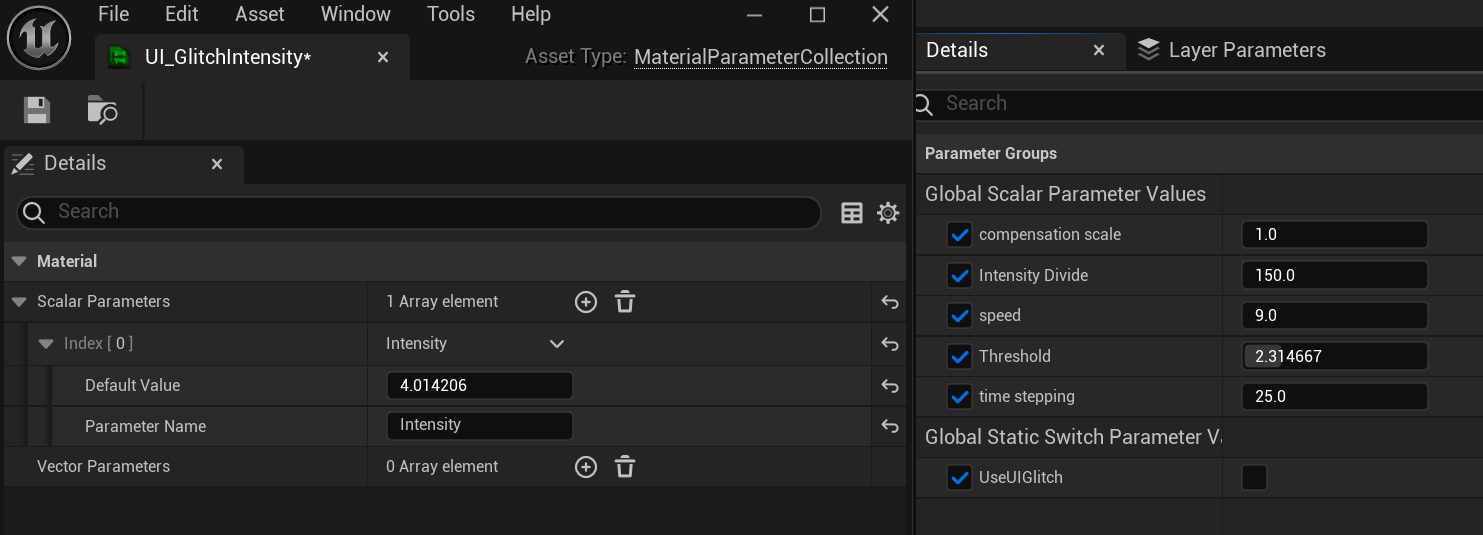
seen below on the right are the parameters i added for the material, most of which control the general feel of the glitching like the stepping mentioned earlier, uv compensation, speed, etc. its the threshold variable that really controls everything though. and when need be, we can even offload this onto a global parameter collection (shown on the left) so we can easily modify it in blueprints or in a sequencer without having to make new instances with different values on the fly (that was our initial approach :( )
now onto the more involved portion, cel shading! unlike the glitch shader from earlier, this is one i did solo. this one also had the most work put into it, in large part because it was far more central to the core visual identity we wanted to give our game.
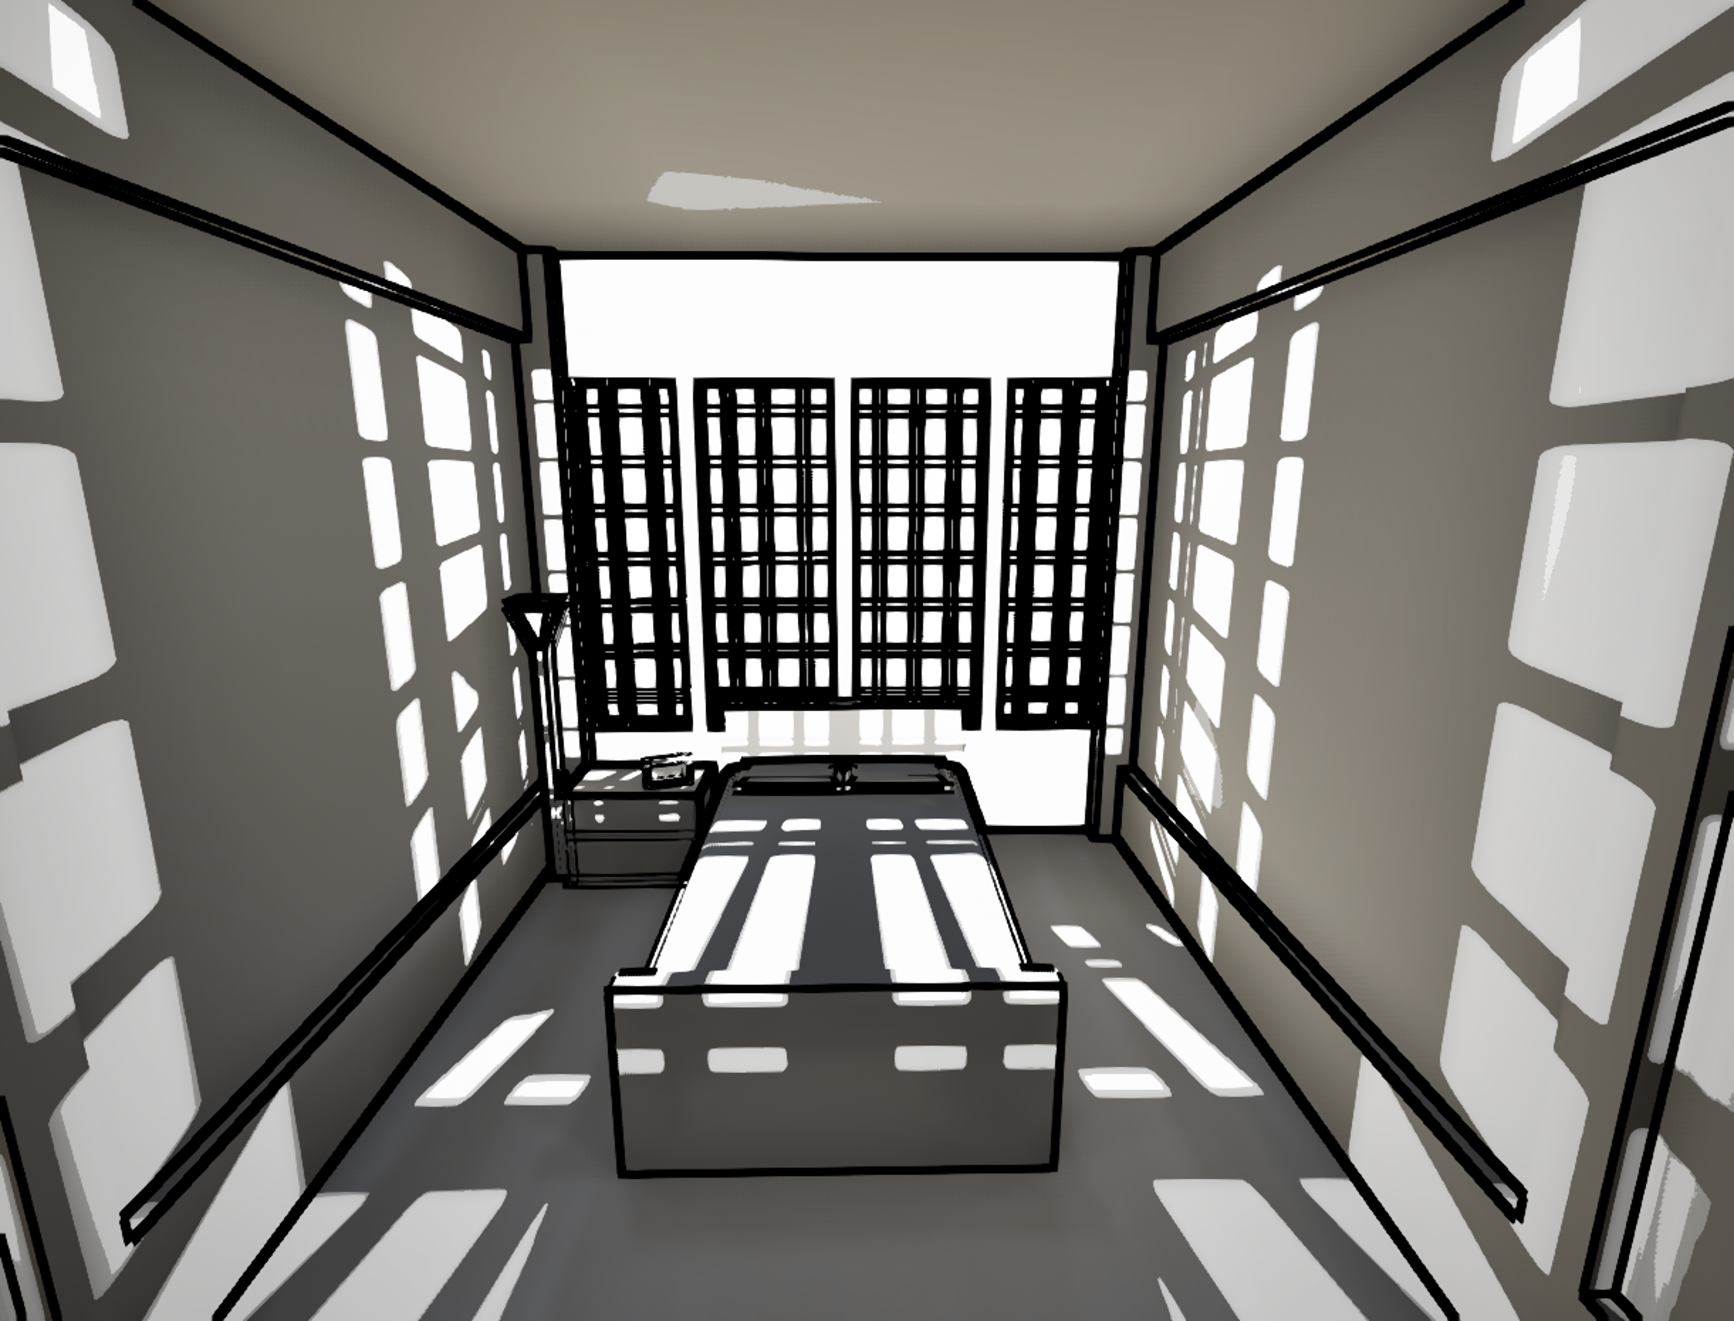
our initial approach was to do this all in a post process shader, and that the approach you see in all of the current builds on itch. there were a few problems with this approach though. 1: everything we did happened after a traditionally rendered frame, and therefore would be adding to render complexity rather than simplifying. and 2: the original approach we took wasn't all that great. it was just a basic color threshold you would normally get by quantizing the value of the rendered frame. i unfortunately did not quantize it traditionally, and instead did each individual threshold by hand.
there were a lot of ways we could go about fixing this, but when we entered full production after the jam, the way i wanted to go about it was in material space instead.

while all of this was largely a solo task on the team, i did get a huge amount of help from Epic forums member 0ne3y3 and his amazing guide on making new shading models in unreal engine. genuinely would not have been able to do it without the guide.
the guide was really involved and it revolved around the whole process of setting up a new gbuffer pass, mapping things to a linear curve axis, and creating the right nodes to be able to pass in your cel shading curves in the shader graph (seen above).
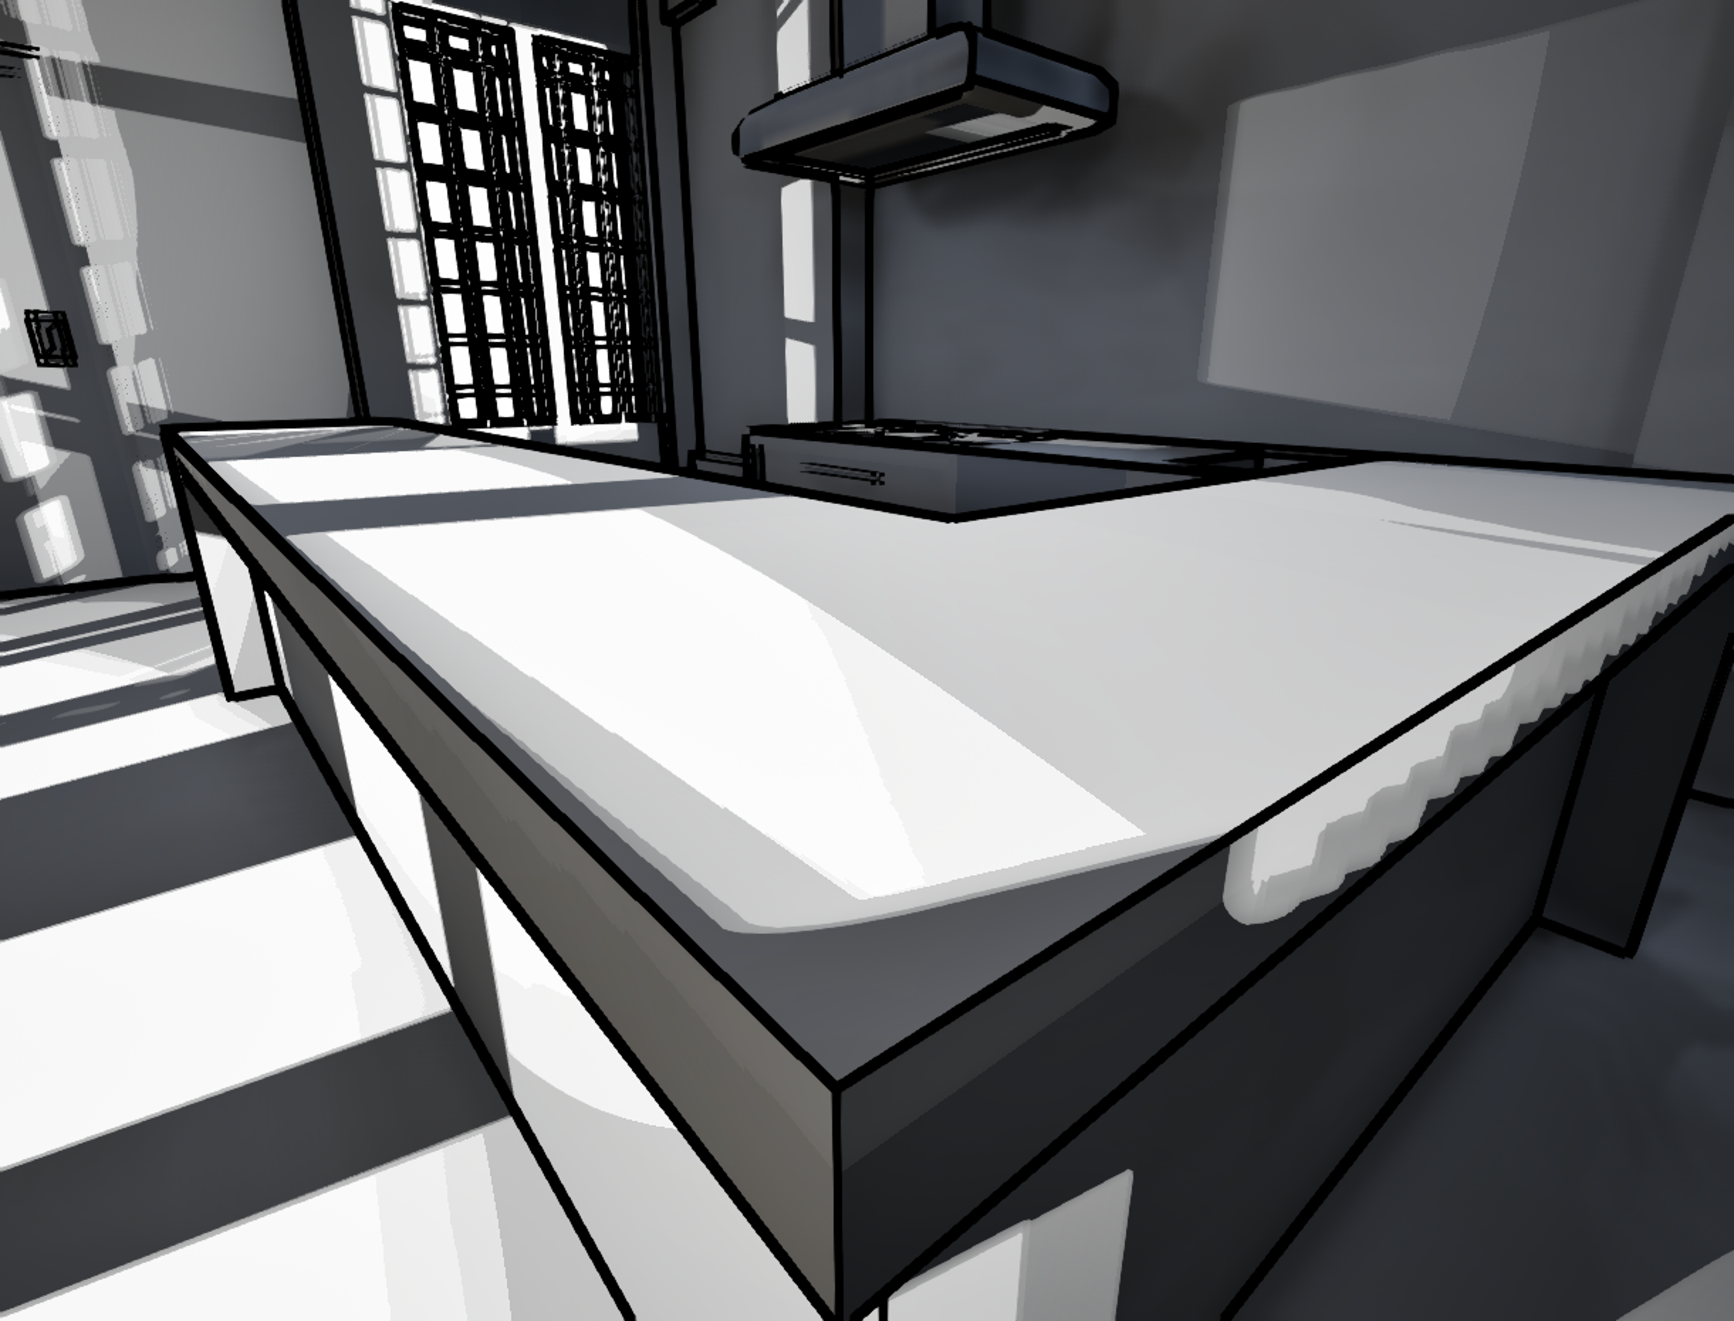
the end results i feel were miles ahead of anything we included in the final releases as far as line clarity and artist side simplicity. unfortunately, we were not fully without issue and there are still some visual oddities. as seen above, theres a bit of jaggedness on the edge of the table, and the door just out of frame is a bit of a mess at the moment.
all that aside, shadows are stable, edges are sharp, noise largely just removed, and the whole ordeal reduced are frametimes by about half. and keep in mind, this is on top of a project that already pulled 90fps average on a steam deck.
One last thing i wanna touch on here is the wire frame shader i worked on. this was initially inspired by a counterstrike AMV simply titled Derealization, and it was a major inspiration for the overall vibe of the game.
the way we achieved this was actually the simplest of any of the above effects. it can be broken down into two main shaders: a material shader that renders each object as a wireframe and outputs to a custom stencyl, and a post process shader that renders everything in the stencil as one color, and everything that isnt as another.
this allowed for heavy parameterization, including swapping between black and white for each. while the effect tends to be used sparingly in game, a cut menu sequence shows it off in a lot more depth.